Top Differences between Dynamic Set and Fixed Set
Dynamic Set
- Set members change when the underlying data changes.
- It has a single dimension.
Fixed Set
- Set members do not change.
- It can be single-dimensional or multidimensional.
Steps to Create a Dynamic Set
The process to create a dynamic set is as follows:
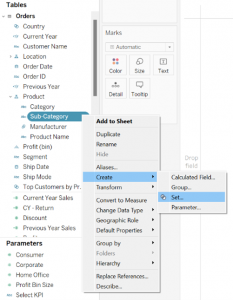
Figure 1: Creating a Set
• In the Create Set dialog box, set up your set. You can configure it using the following tabs:
1. General: Use the General tab to choose one or multiple values to be considered when computing the set. Alternatively, you can choose the Use All option to consistently consider all members, even when new members are added or removed.
If you know the top-selling products beforehand, you can manually select the products as shown in Figure 2 below.
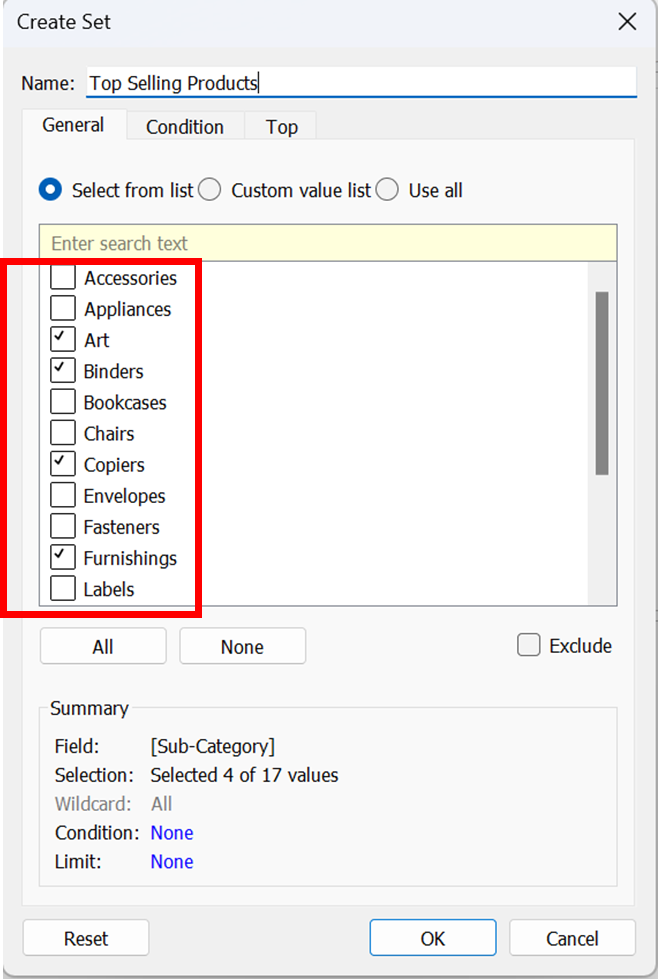
Figure 2: Creating a Set using General Tab
2. Condition: Utilize the Condition tab to establish criteria that decide which members should be incorporated into the set.
You can specify this condition and create the set if you need products with sales greater than $50,000. (Figure 3)
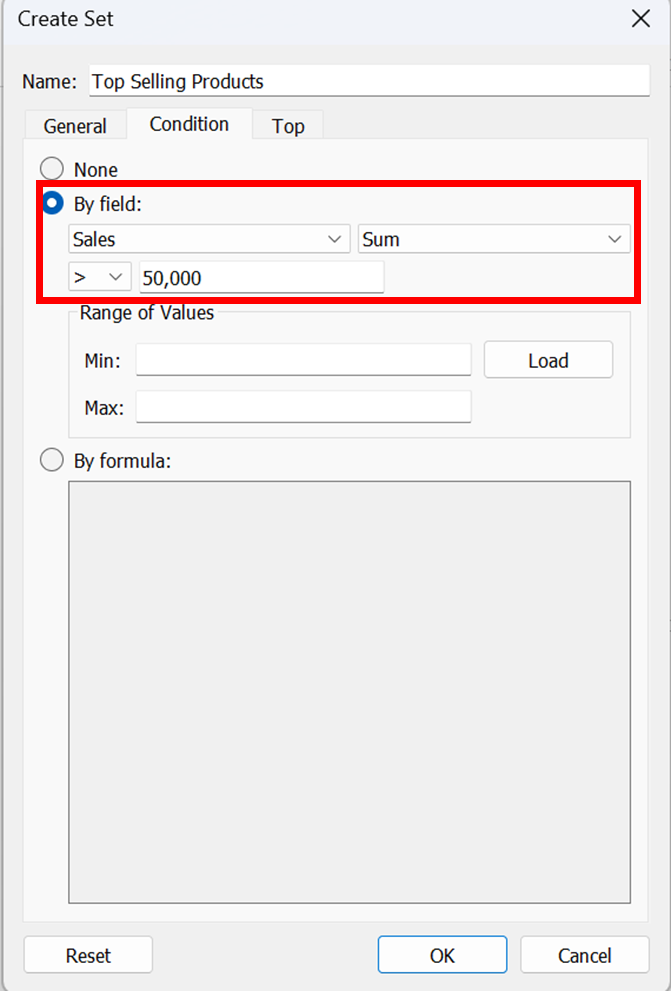
Figure 3: Creating a Set using Condition Tab
3. Top: Employ the Top tab to set restrictions on which members should be included in the set.
For instance, you can establish a limit based on total sales, where only the top 5 products with the highest sales are included. (Figure 4)
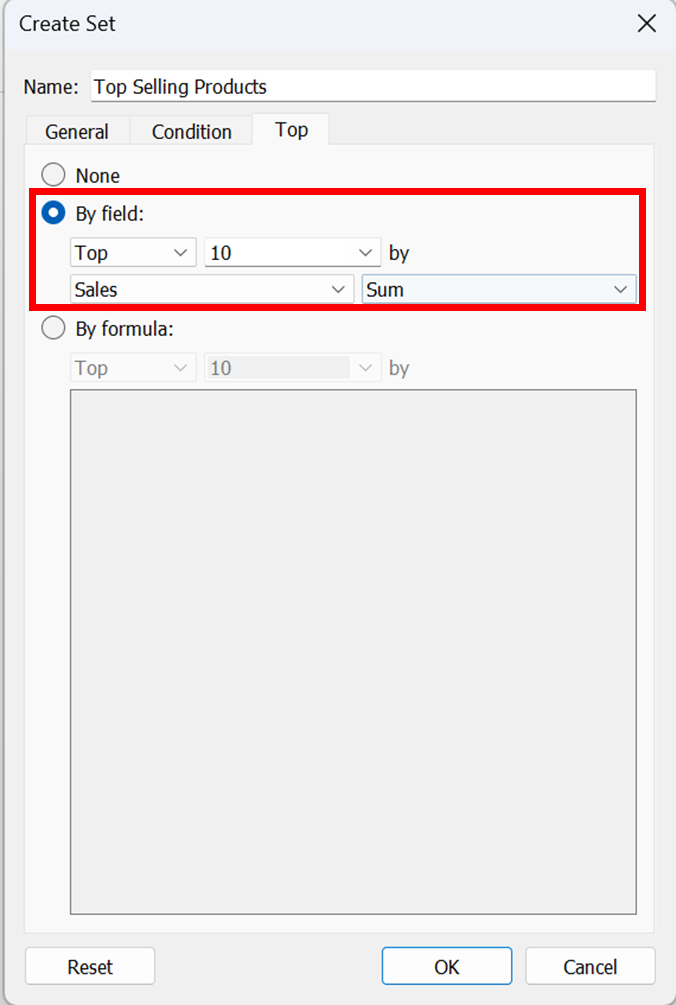
Figure 4: Creating a Set using Top Tab
- Once you have completed the configuration, click the “OK” button.
- The newly created set will appear at the bottom of the Data pane within the Sets section. You can identify it by the set icon, which denotes a set field.
Steps to Create a Fixed Set
The process to create a fixed set is as follows:
- In the developed visualisation, select one or more marks from the view (Figure 5).
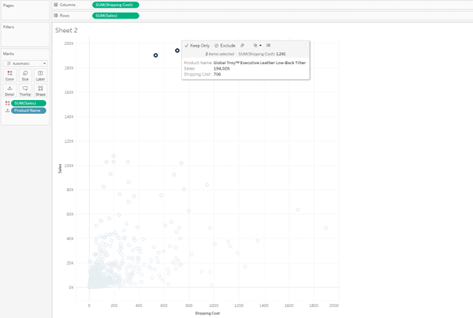
Figure 5: Selecting the marks.
- Right-click on the selected mark and select “Create Set” (Figure 6).

Figure 6: Creating the set.
- Type a name for the developed set (Figure 7).

Figure 7: Typing the Set Name.
- When finished, select “OK”. This newly created set can be accessed from the data pane. When this set is placed in the filter, the view will be filtered to show only the relevant set values.
Top Benefits of Sets in Tableau
• Top N or Bottom N Analysis: Sets can filter the data to display only the top or bottom N values based on a specific condition. For example, you could create a set to show the top 10 products by profit or even combine sets and display the top N and bottom N products by profit in a single chart. (Figure 8)

Figure 8: Top 3 and Bottom 3 Products by Profit
• Segmentation Analysis: Sets can also segment data into groups based on a specific condition. This can be useful for analysing performance differences between different groups. For example, you could create a set to segment customers based on their geographic location.
• Excluding Data: Sets can be used to exclude specific data points from a visualisation. For example, you could create a set to exclude customers who have not purchased in the last six months.
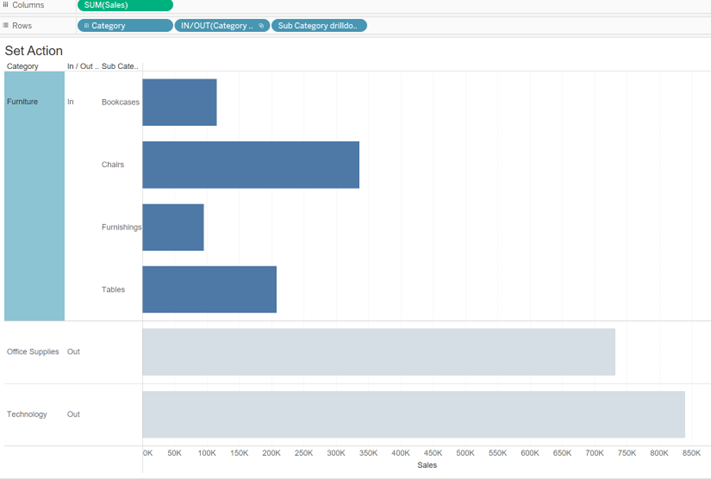
What is Set Actions in Tableau
Set actions allow users to modify the values within a set, on selection of marks within a view. This enables your audience to engage directly with a visualisation or dashboard and control various aspects of their analysis.
To utilise set actions:
- Create sets associated with your data source.
- Build set actions using the created sets.
- Optionally, create calculated fields that incorporate the sets.
- Construct visualisations referencing the sets.
- Test and adjust the set actions for desired behaviour.
To create a set action that helps in drilling down category:
1. Create a set that selects a particular category (Figure 9 shows creating a set using the general tab selecting only furniture)

Figure 9: Creating Category Set using General Tab
2. If you are in a worksheet, go to Worksheet > Actions.
If you are in a dashboard, go to Dashboard > Actions.

3. In the Actions dialog box, click “Add Action” and choose “Change Set Values.”
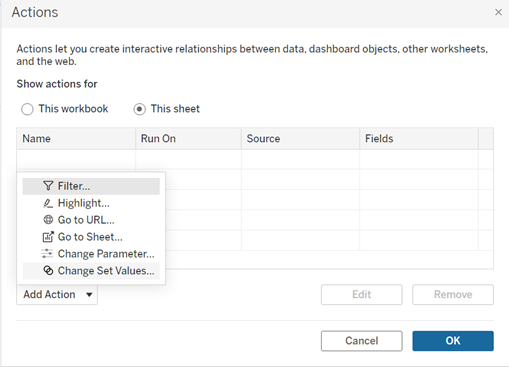
4. In the Add/Edit Set Action dialog box:
• Provide a descriptive name for the action.
• Choose a source sheet or data source. By default, the current sheet is selected. If you opt for a data source or dashboard, you can select specific sheets within it.
• Choose the desired method for users to execute the action:
- Hover: The action will trigger when a user hovers the mouse cursor over a mark in the view.
- Select: The action will activate when a user clicks a mark in the view.
- Menu: The action will initiate when a user right-clicks (or control-click on Mac) a selected mark in the view and then selects an option from the context menu.
• To specify the target set:
- First, choose the data source from the available options.
- Then, select the desired set from the Target Setlist.

Figure 10: Setting up set action
• Specify what happens when the action is run in the view:
- Assign values to set – Replaces all values in the set with selected values.
- Add values to set – Adds individually selected values to the set.
- Remove values from the set – Removes individually selected values from the set
• When the selection is cleared in the view:
- “Keep set values” will retain the current values in the set without any changes.
- “Add all values to set” will include all possible values in the set.
- “Remove all values from set” will remove all previously selected values from the set.
5. After configuring the desired behaviour, click “OK” to save the changes and return to the view.
6. To ensure the set action functions as intended, interact with the visualisation, and test its behaviour.
Benefits of Set Actions
- Filtering: Set actions can filter data based on user selections. For example, you could create a set step that filters the data to show only the top 10 customers in a particular region.
- Highlighting: Set actions can also highlight data based on user selections. For example, you could create a set action highlighting all the customers who have purchased in a particular month.
- Drill-downs: Set actions can create drill-downs that allow users to explore the data in greater detail. For example, you could create a set action enabling users to drill down from a high-level view of category by sales to a more detailed view of sales by sub-category. (Figure 11)